Using Categories
Use this option to assign macros to categories. For example create a Password category to hold any macros containing important passwords or assign any MS Word specific macros to a MS Word category. The categories provide a simple way to find macros after they have been created. A macro may only be assigned to one category.
When the program is first installed, there are two default categories - All Categories and Unassigned which may not be changed. But new categories may be added, renamed or deleted.
•All Categories displays all of the macros in the file.
•The Unassigned category displays all macros not assigned to a sub-category of All Categories.
The category icons may be turned on or off via the Macro Express - Explorer menu, Options > Preferences > Appearance - Explorer tab.
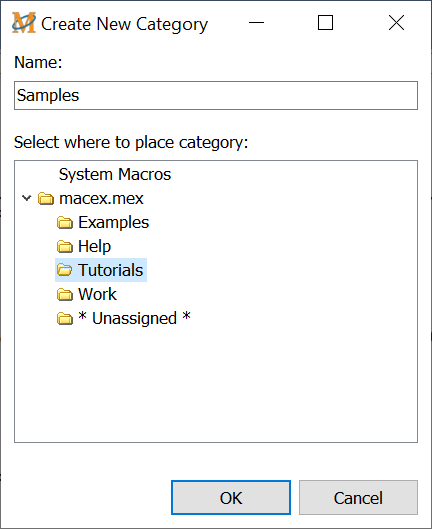
New Category
Select this menu option to add a new category. A new category folder and edit box appears in the category list. Type in the name to assign the category. Also create sub-categories within the category list. To do this, right mouse click on the main folder and then left mouse click on New Category. A new category sub-folder is added to the list.
Macro Express Explorer > Category > New Category
Rename Category
To change the name of a category already created, highlight the category and click on the Category > Rename Category menu option. The category name is highlighted so that a new name may be inserted, similar to the way Windows Explorer works.
Enable/Disable Category
This option disables or enables all of the macros in the category selected. If the category contains both enabled and disabled macros, then the status is toggled. The enabled macros are now disabled and the disabled macros in the category are enabled.
Delete Category
Highlight the name of the category to remove. Then click on Category > Delete Category. A warning message appears verifying that the deletion should continue. Click Yes to delete the category and all of it's sub-categories.
Placing Macros in Categories
Once a category is created, there are two methods for moving macros into a category.
Highlight the macro to be assigned and click on Macros > Move to Category to display a list of categories such as in the example below. Choose the category to move the macro into and press the OK button. The macro is now assigned to the category selected.
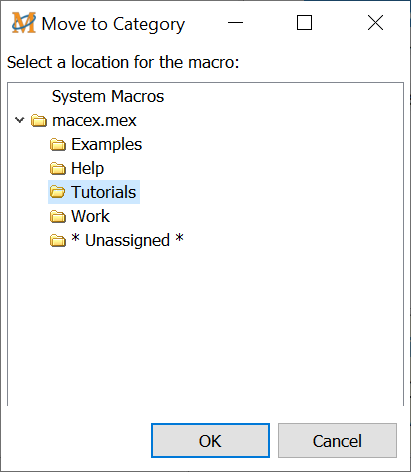
Macro Express Explorer > Macro > Move to Category
The other method is to drag the macro from the Macro Explorer list to the desired category. To drag the macro, highlight the macro, hold down the left mouse button and move the pointer to the category listed in the Category column. When the mouse is pointing to the correct category, release the left mouse button. The macro is assigned to the category. Expand the category to view all macros stored in that category.
Using either of the above methods, highlight a block of macros and move them all at once to the category of choice.
üNote: The categories selected are specific to the macro file that is currently open. When opening a new macro file, the categories created for the new file are displayed. If more than one macro file is open, multiple sets of categories are displayed, one set for each macro file.